A Comprehensive Look Into Construction of Wood Exterior Blinds and Shutters With a Touch of History
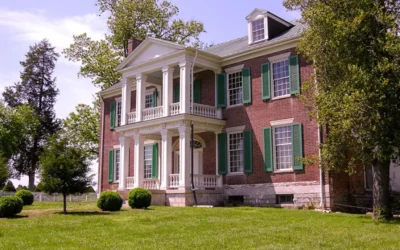
The preservation of historic buildings has both historical and sensible value. Older buildings carry the stories of our shared past and capture the nostalgia of a bygone era. But they also have practical worth in terms of the quality of materials used in their construction; rare hardwoods like heart pine or wood from virgin forests that have long since been destroyed.
Communities are now coming to realize not only the significance but also the usefulness of these older buildings for neighborhood revitalization as they are restored and pressed back into service as new homes or for business use.
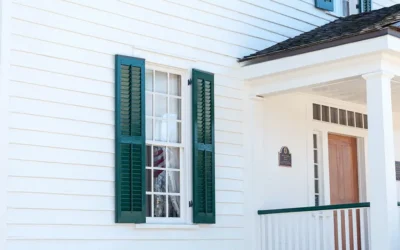
Preservation of buildings takes a lot of money, effort, and care. Restoring an older building also takes attention to detail and a commitment to getting each and every feature historically accurate.
Over the past 34 years, my passion has grown exponentially for making historically correct blinds and shutters employing hinging applications used in the past.
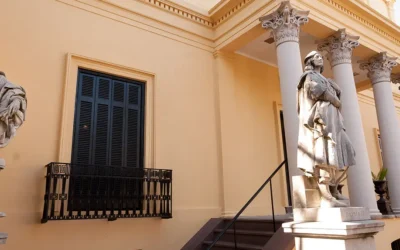
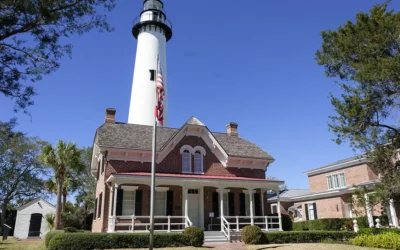
Cobblestone Millworks has been involved in the restoration of historic properties including the Appomattox Courthouse National Historic Park, Graceland Mansion, Little White House, the Lighthouse at St. Simons Island, and Booker T. Washington State Park, to name a few.
The challenges we encounter on a daily basis involving the process of custom and historical matching, design, proper use of material, exceeding structural integrities and warranties, hardware applications, and proper millwork terminology have given us a wealth of knowledge on the subject.
In this article, we offer our expertise to architects, purchasing agents, homeowners, and our customers to help them understand the process of creating historical blinds and shutters while restoring an older building to its former glory.
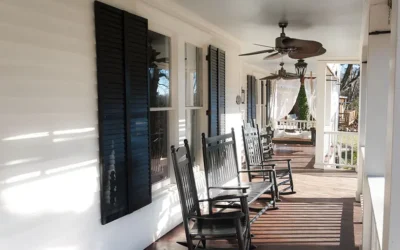
A Brief History of Louver Blinds
Historically, louvered blinds performed two functions which included admitting light and ventilation into a home. Louvered blinds could be closed to minimize the heat from sunlight while allowing ventilation and privacy when they were in the closed position.
When hinged with the blinds in the closed position, fixed or stationary blinds would have been in the down position from the outside allowing rainwater to shed off to the outside façade of the home. Fixed louvered blinds were appropriate for buildings built prior to the Civil War.
The earliest window blinds pre-Civil War era consisted of heavy rails and stiles. Frames were thick and all the louvers were fixed into the frames. These frames were slotted to allow the louvers to slide into the slots and held in by wooden fillers or beads with or without glue. Some of these were a simple S4S (surfaced on all 4 sides) rectangle louver which projected beyond the thickness of the frame in the front and back.
In the historic district of Beacon Hill, Massachusetts, we find this style blind with a concave architectural scallop profile cut into the louvers on both ends flush to the face with the addition of extended stiles beyond the bottom and top rails commonly referred to as horns. Horns were most likely to accept hold open, functional period hardware.
As far as I can tell from my research, the use of operable louvers with adjustable tilt rods grew rapidly thereafter and became popular with the dawning of the Industrial Revolution. New mechanized factories and the transition from hand production to more modern woodworking machines allowed for the advancement of louvered blind production. Exterior window blinds became commonplace.
Moveable Louvers
By the 1850s, blinds were made with louvers that pivoted or were moveable. Louvers were stapled to a wooden rod (control rod) which linked all the louvers together. The ends of each louver were an extension of the stock itself, usually leaving a 3/8” square extension by 3/8” long, then rounded over and inserted into a round matched hole in the stiles.
The extension of the louver was most likely accomplished by a method of chucking the ends and then they were possibly rounded by hand. It is also my theory that this may have been accomplished with the use of a lathe with a four-jaw chuck since almost all the louvers that we have replaced over the years were evenly rounded with uniformity.
The top of the control rod fits tightly into a notch in the horizontal rails to hold it in place. This would allow the louvers to be adjusted from the interior of the rooms to improve ventilation when in the closed position.
Flush Bevel Fixed Louvers
Also, pre-1850s era, this fixed type louver is cut on both ends between 30 and 45 degrees angled perpendicular to the face of the frame. The degree of cut will depend on the degree of angle when the slat is installed into the frame. The end result will be a slat flush to the face of the frame on the front and backside of the blind.
The actual width of this type of slat will depend on the degree to which it is installed and the thickness of the frame stock. We typically recess this slat or narrow its overall width slightly to be below the face 1/16” for a shadow line effect. When we machine them through our molders, we slightly ease the tip since the points are prone to splitting. Each slat end is then chamfered and manually inserted into an identical slot in each of the stiles.
We will sometimes add a simple face applied molded trim to the front and back of the blind which adds a very attractive feature. This example of a fixed louver seemed more dominant in the southern region of the country. I refer to this style as a flush bevel louvered blind in our catalog and have replicated hundreds of variations over the years.
Radius-Fixed Louvers
Radius-fixed louvers are the most common style of louvered blinds found today. These fixed slotted louvers became common in the early 1920s and took the place of moveable louvers as blinds became less functional in use. Hybrid styles of shutters which included a mix of panels and louvers in different combinations also become commonplace.
Typically, ¼” to ½” in thickness, widths can vary from 1 1/8” to 2 ¼” wide. The radius or bullnose will always be equal to the thickness of the slat. Very easily manufactured either on a shaper or with a high-speed molder for volume. This radius slat is assembled into the frame having an identical groove plowed to the depth of 3/8” into each side stile. The length of the slat is cut approximately 1/8” shorter than the total span allowing for relief due to expansion and contraction. The two ends of each louver are chamfered for guidance to aid in the installation. Installation can be accomplished manually or by automation. The side stiles are plowed using louver slotting machines and computerized routers. Contrary to popular belief, the slats are not glued in place.
Panel Shutter Terminology
Any discussion of historic shutters and blinds needs to begin with a clarification on the meaning of the terms and how they differ. A shutter is not a louver blind. Today the word shutter seems to have encompassed both. The distinction between the two has become vague or seen as equivalent simply for convenience. A shutter is of a panel construction consisting of a flat or raised panel design in a frame. If the frame is filled with louvers, it is then simply a louver blind.
Next, a panel is not considered a section. There is no such thing as a two-panel louver. A section refers to a division or segment of a shutter or blind which is divided by a horizontal rail. A single section is the absence of a horizontal rail while the most common, two equal sections, has one horizontal rail. Cottage-style window sashes require an off-center horizontal mid-rail. Three sections with a smaller panel in the center are most commonly referred to as a Williamsburg, while a small panel at the top indicates a transom head design. They are rare, but we have manufactured four-section shutters or blinds. I am of the opinion that the term “panel” was first introduced by the interior shutter and blind companies. I have also heard this referred to as a “field” which seems appropriate. We need to try and encourage the correct usage of these terms.
Types of Shutters
Board and batten design consist of a layer of vertical boards held together by horizontal battens with optional diagonal braces that are considered shutters. This style was referred to as a plank shutter in the early 16th century and was used in less refined structures such as cottages, stables, barns, and workers’ cottages. Historically, board and batten shutters would have been used for privacy or security. Boards would have been butt and nailed together on battens since screws were handmade, too expensive, and less effective than modern wood screws during those early years. More modern patterns were later introduced by leaving spaces between boards or by machining a tongue and groove detail on the inside edges. This pattern is more commonly referred to as reverse board and batten shutter. This pattern will always be much more stable since each board is locked together. A nice additional touch is to bevel or chamfer the edges of the battens and braces. Decorative metal clavos can be added for a rustic hammered nail look. Board and batten styles were favored in French locales like New Orleans.
The simplest type of shutter is constructed with flat panels. This style began to appear in the late 17th century in Beaufort, South Carolina. This design eliminated the warping that might have occurred with plank shutters. Flat panels look fine especially with a simple cutout motif or with an added low profile molding or stop. Many of the standard cutters today only offer a thin rabbet or plow down the center and restrict the thickness to a ½ inch. This is not sufficient for a solid panel. A wooden flat panel shutter should consist of at least a ¾” thick stock, especially in wider widths.
Raised panel shutters are the most common type. Raised panel cutters are offered with a number of different style profiles for a ¾” thick material. Most manufacturers offer only one standard profile due to mass production. That is acceptable if you are not trying to replicate or match existing shutters. We also keep our standard profiles with our higher-volume product lines but maintain an expensive inventory of 12 of the most common profiles which encompass most raised panel profiles used in the manufacture of shutters today. This also allows us to keep our customer’s costs down when we take on replication projects. Panels can be single-sided or double-sided raised. If you are not hinging your shutters, there is no need to raise both sides.
When the panels are assembled in the frame they must be machined so that they float freely within the frame to allow for any dimensional changes due to fluctuations in climate. If you also restrict the panels from movement with glue, brad nails, or caulk you can cause the panels to split vertically. This is one reason why I am not a big proponent of adding high-profile moldings or appliqués to flat panels. While they look attractive, if they are not properly installed, they can restrict movement allowing moisture to be added and they can become unattached over time. On Colonial period homes (1895-1940), raised panel shutters are seeing a revitalization.
Panel Shutter Cutouts
Our approach to this topic is a simple one. We offer our own library of templated designs such as animals, flowers, trees, and other objects from which the homeowner can choose. Our new modern computer numerical control (CNC) machinery and software allow the customer to simply pick a picture, sketch, or drawing of their choosing and forward it to our computer-aided design (CAD) department for replication. We then import that PDF, PIC, or DXF file into our CAD/CAM program before sizing the cutout based on your shutter sizes. It is important to remember that shutter widths will vary the size of each individual cutout. There is one fee regardless of complexity and from there we reduce the price based on quantity. We maintain your cutout design on file in the event you need additional shutters in the future. Panel shutter cutouts were only just introduced during the 20th century to personalize your home.
V-Grooved Panels
This is a simple process of applying faux lines with a router typically using a ½” v-groove router bit running vertically on a raised or flat panel to simulate the desired width board. This process should be applied to both sides of the panels to prevent cupping and splitting while balancing the panel. It is a very attractive addition and one of my personal favorites.
Guidelines To Preserve Panel Shutters
Since panel shutters have a greater tendency to capture moisture and accelerate rot more so than louver blinds, there are six basic guidelines to help preserve your panel shutters for longer service life.
1. Try to minimize the width of your shutters when possible. Two 18” wide shutters for a 36” window opening should be the limit.
2. If that is not an option, we offer panels constructed with a cross-bonding technique. We take two thin layers of material glued together with opposing grain to achieve the desired thickness. This will add some weight, but will completely minimize splitting. Most door manufacturers use a similar process with a substrate inner core.
3. Be sure to ask how the panels are being glued together. Most manufacturers edge glue their panels together with opposing grain, either with or without an added spline. The more desirable way is to shiplap or tongue and groove giving it an interlocking edge and a higher gluing surface. Prior to gluing panels, wiping the contact edges with acetone will remove excess pitch or moisture from the wood allowing for a more uniform glue joint. In most cases, all of the methods will look exactly the same when glued together and sanded. Alternating shiplap will always be far superior and my preference.
4. When applicable, pre-prime the edges of the panels which are hidden in the rabbet before installation. This will also prevent the unpainted surface of the panels to be exposed when the panel shifts in service. You would be hard-pressed to find a company that exhibits this type of personal attention to detail. This process is solely done by us upon request. Note: Panel movement is not considered a warranty issue with any manufacturer.
5. Install weep holes to allow water to drain and not be trapped. We accomplish this by drilling a diagonal hole in the corners at the top of the middle and bottom horizontal rails.
6. Obviously, a good primer coat and two good top coats of high-quality paint are always your best defense against premature rot.
Basic Structural Principles
Shutters and blinds come in a variety of thicknesses, widths, heights, materials, and types. Generally speaking, louver blinds are lighter than panel shutters since the panels that fill the frames are often heavier than the louvers. Panel shutters are similar to door construction, but doors are usually not exposed to the weather and elements, and when shut, are encased in a frame allowing for some support, unlike exterior shutters and blinds.
Shutters and blinds are subject to natural elements including rain, wind, and sunlight. Most historical applications are installed to meet functional requirements using some type of hinge method which exposes the shutters and blinds to structural fatigue in addition to the forces of nature.
For hinging applications, shutters and blinds are also subject to other forces including compression, tension, and shear. Compression shortens or compresses an object and occurs when the top of the horizontal rail meets the vertical stile causing a crushing effect. Tension elongates or expands the dimensions of an object pulling apart the outer stiles on the hinge side. This is better known as sagging (sideway forces, strain, or stress). Shear failure occurs where fasteners of interlocking joints shear out to the nearest end-grain surface. This causes portions of an object to move or slide in parallel, but in opposite directions.
The use of improper types of hinges or hinging methods can have a direct effect on the structural integrity of your blinds and shutters, and in some cases, may cause joinery failure. If you plan on using hinges, it is important to consult the manufacturer on which type would best support your blinds and shutters taking into consideration size and weight loads that would result in the least amount of undue stress. We routinely provide this information to our customers upon request.
Different Methods of Joinery
The main consideration for choosing the correct method of joinery is to design the joint to maintain the frame (carcass) while keeping its shape and maintaining a square. The following types of joinery methods can be used on shutters and blinds.
So Which Type of Joinery Is Best for Our Blinds and Shutters?
Mortise and tenon is the best method of application for our blinds and shutters. Most historical shutters and blinds were constructed with this method. This type of joinery is the strongest and when low-angle wedges are driven in from the outer edge, no glue is necessary.
A great example of this method is a historic project we were commissioned to reproduce in Southern Virginia replicating nine pairs of louver blinds in antique heart pine. The homeowner was resolute that the frame of the blinds be assembled without using glues, epoxies, or metal fasteners while maintaining historic integrity and functional requirements.
No matter what type of joinery is used for the construction of your exterior shutters and blinds, copper capping can be used to help ward off moisture where the stiles meet the top rails.
Glues and Epoxies
The term adhesives include any substance having the ability to hold two materials together by surface attachment. Glues are the most common adhesives for bonding wood. Choosing glue is not easy. We must take into account factors such as the type of wood, temperature, humidity, type of joinery being glued, working properties of the glue, and finally cost. No adhesive will perform to satisfaction if not used properly. There are several types of special-purpose adhesives such as hot melt, construction adhesives, and contact cement which we rarely use in the manufacturing of shutters and blinds. The following types of glues are commonly used in bonding wood.
For most of our softwood applications like western red cedar, we use a modified PVA (polyvinyl) acetate 1-part waterproof type of adhesive. It is easy to apply, quick-drying, nonstaining, and less expensive than epoxies.
Machining is also critical when gluing parts. Uniform thickness and flatness are always necessary to obtain proper adhesion. When exceeding the standard girth requirements in louver blinds, and especially with the excessive weight of raised panel shutters, we substitute the previously mentioned epoxy resin to ensure the products will not separate when hinged.
Wood Species To Consider When Manufacturing Shutters and Blinds
Shutter and blind construction today involve more options than years ago. New composites of various materials offer competing benefits trying to oust wood as the traditional choice, but wood is still the preference with historians and architects. To begin, there are two basic types of wood, softwoods, and hardwoods. Since wood is the main ingredient in the construction of shutters and blinds, we should evaluate the two to help better understand the pros and cons of each.
Hardwoods
It is simple to think of hardwoods as being hard and durable compared to workable softwoods. This is the general rule. Hardwoods are far more resistant to decay than softwoods and are more durable. They are also considerably more expensive to purchase and harder to machine and mill.
Most hardwoods are denser, meaning they will last longer. The denser wood is, the much stronger it is. Hardwoods come from deciduous trees which lose their leaves annually. Some examples of deciduous trees are red and white oak, mahogany, basswood, maples, and Spanish cedar and teak.
A good example of the density difference (lb./ft. 3) between hardwood and softwood is that mahogany, which is a hardwood, has a density difference of 31 to 53 while cedar, which is a softwood, has a density difference of 23. This means mahogany is almost twice the weight of cedar. Dense wood swells and shrinks more than wood that is less dense making it more difficult to machine and fasten and causing more wear on knives and tooling.
Durability is a term sometimes used to connote strength and refers to the ability of wood to resist rot. But, durability should not be confused with strength, as some rot-resistant species are not particularly strong.
Softwoods
Approximately 80% of all the world’s timber comes from softwoods. Most softwoods have a lower density than hardwoods. They are typically less expensive, grow at a much faster rate than hardwoods, and are much easier to machine and mill.
Softwoods come from a conifer tree which usually retains its evergreen needles. A few types of these conifer woods would be Douglas fir, ponderosa pine, redwood, western red cedar, western hemlock, and southern yellow pine. Cypress would be the exception since it sheds its foliage in the fall like hardwoods do. It grows alongside hardwoods and is traditionally grouped and manufactured as hardwoods. Cypress gets its natural resistance to rot from a naturally occurring preservative called cypressene.
Pinewood is a soft white or pale yellow wood light in weight, affordable, and is used in interior furniture, cabinetry, windows frames, doors, floors, and moldings. It is used prolifically for interior trim products and moldings. Pine for exterior use is not recommended without regular treatment with products to seal out moisture.
Some softwoods such as redwood, cypress, and western red cedar have excellent natural decay resistance and dimensional stability, yet strength, shock resistance, stiffness, and hardness are moderately low. The machining properties and workability of softwoods are generally much more desirable than hardwoods.
The natural acidic oils or tannins which are found in redwoods and most cedars give softwood its natural decay-resistant character, but tannins can ruin the finished painted surface through a process called extractive bleeding. An appropriate oil-based, tannin-stain blocking primer paint must be used to prevent this.
The price point with softwoods has generally been less expensive than hardwoods, but old-growth redwood is extremely rare and very cost-prohibitive, and western coast cedars have been steadily climbing in price with current softwood trade tariffs between Canada and the US.
Log Sawing Techniques
Quality comes from the cutting. A log can be sawn in different ways to make the best use of the wood and to obtain the best pieces for a particular purpose. The most common cuts are:
Through and through sawn or slab sawing is sliced from end to end (axis) in line with the grain. This type of cut can produce a few boards near the center of the log that can contain pith. When recut or radial sliced, it can yield two quartersawn boards. Waste is minimized, but boards are prone to warping.
Flat-sawn is a tangential slice from a log mostly tangent to the annual rings. This method avoids including the unstable heart of the tree which is box cut out and discarded. When drying, movement will mostly come from the width of the board which is not desirable.
Traditional quarter sawn material is what we primarily use in the construction of our shutters and blinds. It is a radial slice of a log perpendicular to the face between 60 and 90 degrees.
Quartersawn lumber takes longer to dry than flat sawn. Moisture is released from the edges of the board rather than the face when drying. This type of sawing technique can also be referred to as vertical grain. This cut produces a separate grade that can be sold at a much higher premium and produces boards that are dimensionally stable and less apt to warp or twist when machined.
Construction Techniques of Radius Top Blinds and Shutters
With this last and final segment, I will explain the construction techniques on how to manufacture radius head blinds and shutters to match existing arches. It is understood that there are different radius arches such as a half-circle, quarter-circle, gothic top, elliptical, and also a segment of a circle. I will begin by referring to the top radius extension of the stiles regardless of its arch as a radius top rail for this discussion. Overall length is the longest side (leg) of a blind, and the short side (leg) is referred to as the spring side or where the arch begins.
We start with a horizontal top block rail of the same thickness as the frame. This rail is not an extension of the stiles. The rail is wide enough vertically to accommodate the arch cut after it is installed in the frame using the same type of joinery techniques drawing the arch on the rail or copying to a template.
You then simply cut the arch using a band saw. This is sanded to perfection to complete the process. The advantage to the block top process for panel shutters is reduced labor shaping the panel into an exact archtop. A rectangular panel is installed while reducing the labor costs to cut it exactly to follow the curvature of the arch. The same is true of a louver blind. The louvers will end at the bottom of the block top rail.
One advantage may be its structural component strength compared to traditional radius construction methods and also possible hinging applications. While this method is the simplest and the least expensive way to produce a radius top blind or shutter, it is not necessarily as visually attractive as the more commonly preferred method.
To begin with, both louver and panel top shutter frames are constructed almost in the same manner. First, the radius top rail must be cut for the radius head of the curve. The outer side of the frame is drawn and cut as close as possible to your template line and sanded smooth.
Next, the curve on the inner edge is transferred, then cut and sanded. This will be finished at the same width as your side stiles. With blinds, you can mortise in and glue both shoulder ends of the radius top rail into the side stiles. But with panels, you must first profile your ogee inside of the radius and top shoulder end to accept the panel.
Unlike louvers, a spline miter or a doweled miter would be acceptable since the panels can help to lock the joinery together. The panels are then simply traced and cut before the panel profile is added and you are ready to assemble. Assembly usually requires a lot of clamps.
Installing louvers into the radius head is totally different from a panel. Here is where it gets fun. After you assemble the entire blind with the radius top rail glued in place, you are ready to install the louvers. The longest side stiles will already have their slotted holes completely up to the top end of the stiles for one right and left-handed blind to accept louvers.
There will be no slots in the radius top rails, so each louver will need to be cut to fit the radius precisely. Starting at the bottom and working up into the arch, a millworker will layout and trace each louver for length and also to the exact inside radius of the head curve for either a right or left-hand blind.
The next step is to set up a template or jig to hold the louvers in place to the same pitch angle and then the millworker must freehand cut with a band saw to the cutting line of the louver.
It is standard practice to cut just slightly outside the waste line to allow for sanding. This cut is commonly referred to as a double compound cut which consists of two angle blade cuts the tilt of the blade and the miter cut, or in this case, the line cut completed with one process.
Each louver is precisely hand-sanded to ensure proper fit since the cut will be seen on both sides of the blind. Sometimes this process may take more than one attempt. Each louver is glued on both sides and sprigged into place with a small brad nail until all the louvers are installed.
This process is time-consuming. Since the left blind has a different opposing pitch angle from the right face, the louvers are not interchangeable from one hand to the other and the process must be entirely recut. Only with a large quantity of radius blinds would I attempt to try to automate the process since the setup time may take hours.
At this point, it might be worth mentioning that while extremely rare and difficult, we can slot the radius top rail to accept the louvers, allowing them to be installed on both ends, not just on the long leg as I have just fully discussed. We have recently completed a project of 8 mahogany louver doors 2 ¼” thick with true half circle tops.
The preservation architect required the louvers to be slotted on both ends including the radius head and would not allow them to be glued or nailed. I am not quite sure if this process is necessary on louver blinds as it is with doors, but we have the ability if your customer requires it.
Conclusion
It is both challenging and meaningful to carry a replication project from design to completion. The complexity and detail that goes into each project, including historical matching, design, proper millwork, and correct hardware application, can be difficult.
However, our experience helps us to build even the least expensive product lines with the highest quality and we are able to achieve a blend of customization with standardization in our product lines. We enjoy helping our customers through all stages of a difficult project, offering AutoCAD line drawings for pre-approval to minimize mistakes on both ends.
We are proud of the contributions we have made to historic preservation projects throughout the country, many of which we never get to see in person. It is enough to know that somewhere there is a historically accurate building that we helped to preserve for future generations and giving it new life and purpose.